
When I measure a dirty record on a spectrum analyzer the first thing you notice is broadband hiss that sits above the bass energy, typically masking detail below around 100 Hz. Cleaning a record by hand is less about ritual and more about improving signal to noise. Small reductions in surface noise equate to better perceived bass clarity, wider dynamic range and a quieter listening experience.
Think of a vinyl groove like a tiny canyon carved with audio data. Dust and grime are like pebbles and silt that change the canyon walls and scatter the stylus. Clean the canyon the right way and you restore more of what was actually cut into the lacquer. In my experience, a careful, repeatable hand clean will often give you most of the audible benefits of an automated machine without the cost or storage headache.
When to start with a dry brush
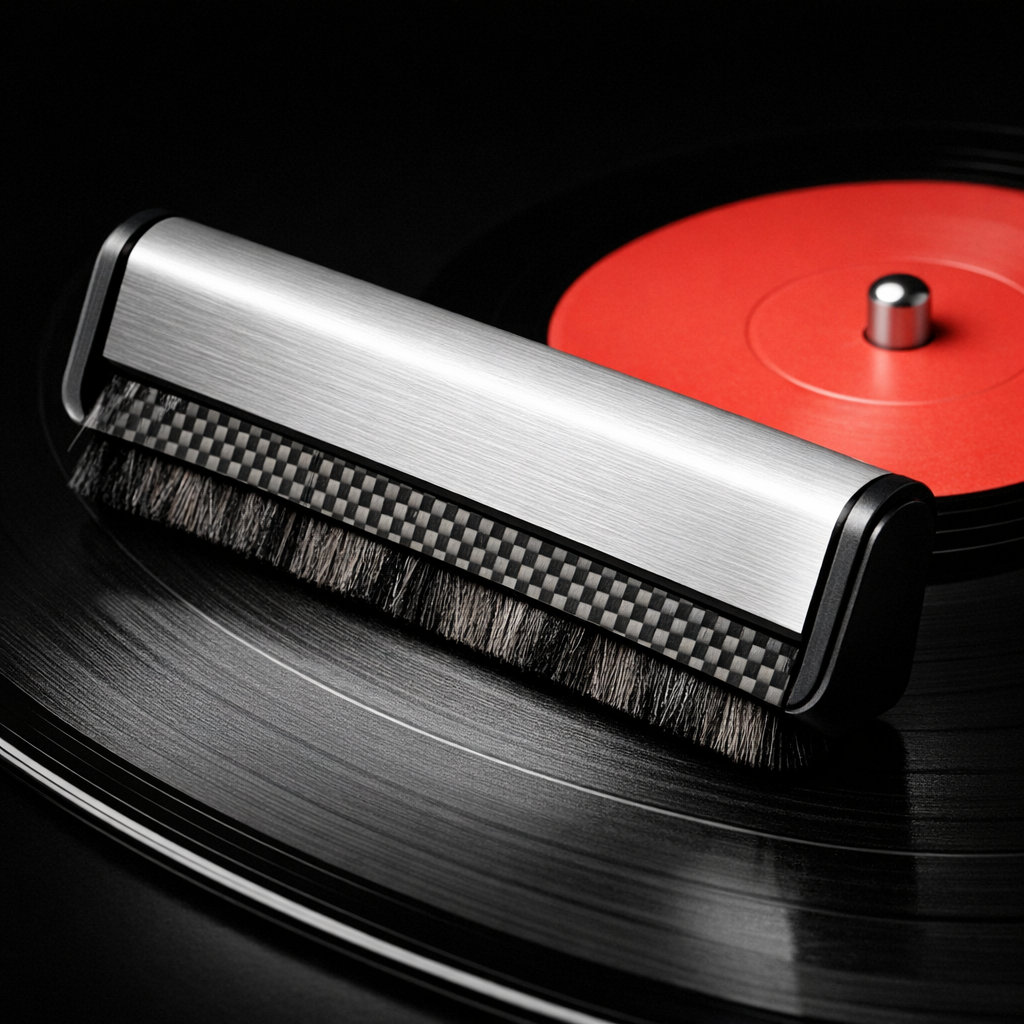
The first and simplest tool is the carbon fiber anti static brush. Common models I reach for are the AudioQuest anti static record brush or the Mobile Fidelity carbon fiber brush. They are typically 8 to 10 in (20 to 25 cm) long, which covers the surface nicely without bending the headstock.
Follow these quick rules:
- 1. Always begin dry. Use the carbon fiber brush to remove loose dust before any wet work or playback. Brush along the grooves, concentric with the record, not across them.
- 2. Hold the record by the edges, resting it on a flat, clean surface or a record clamp if you use one in the studio.
- 3. Use soft, light strokes. The brush is anti static and will pick up particulates without scouring the vinyl.
Here's where it gets interesting: I had a 1972 pressing come through the studio last year that sounded thin and brittle. Two minutes with the dry brush removed most of the fine dust and restored body to the low mids. Dry brushing is free, fast and often all you need for recent pressings and records stored properly.
Preparing the cleaning solution
Wet cleaning is for when the dry brush and a careful play session do not remove persistent surface grime, oil or finger prints. The technical reality is that you want a cleaning fluid that lowers surface tension, carries away micro debris, and rinses clean without leaving mineral residue.
Use distilled water as the base. Tap water contains minerals that leave residue in the grooves and can catch light as a haze. A conservative, practical mix I've used for years:
- 500 mL distilled water + 1 to 2 drops of mild non ionic dish soap (such as a gentle baby or synthetic phosphate free soap).
Alternatively, purpose made record cleaners are formulated for this job (Mobile Fidelity, Record Doctor type solutions). If you pick a commercial cleaner, check the MSDS for non ionic surfactants and low solvent content.
Equipment checklist:
- Microfiber cloth, lint free, roughly 30 × 30 cm for handling and drying.
- Velour pad or soft lint free pad for rinsing and blotting.
- Soft bristled applicator or foam swab for spot cleaning; avoid household scouring pads.
- Distilled water in a clean spray bottle if you prefer controlled application.
The hand-clean process step by step
From an engineering standpoint you want to minimize lateral forces and avoid pushing debris deeper into the groove walls. Breaking this down further, follow these steps for a safe, repeatable hand clean.
- 1. Inspect and dry brush: Hold the record by the rim and label. Run the carbon fiber brush along the grooves for several full revolutions. Rotate the record while brushing to let the brush do the work.
- 2. Isolate the label: Keep the label dry. Water and alcohol can damage paper labels and printed inks. Protect it with a thin plastic slip or simply avoid wiping over it. In my studio I use small plastic disks to cover labels when wet cleaning lacquers and reference pressings.
- 3. Apply cleaning solution sparingly: Dampen the velour pad or microfiber with your distilled water mix. You can also spray a little solution directly onto the pad, not onto the record. Work in the groove direction, applying very light pressure.
- 4. Rinse by groove direction: After a gentle scrub (only if necessary), rinse with plain distilled water to remove any detergent residue. Residual soap is the enemy of optimal signal to noise because it can leave a film that traps dust.
- 5. Dry with care: Blot or lift radially from the inner groove to the outer edge. This avoids sweeping debris deeper into the spiral. Do not rub across the groove. Use a dry, lint free microfiber to finish.
- 6. Let it air dry vertically: Stand the record on edge in a clean LP rack until fully dry. Do not stack damp records. Vertical drying prevents trapped moisture and potential mold growth in sleeves.
- 7. Store in anti static inner sleeves: After drying, place the record in a polyethylene or rice paper inner sleeve. These reduce recontamination and static buildup before playback.
For context, typical record diameters are 7 in, 10 in and 12 in. Playback speeds are commonly 33 1/3 RPM and 45 RPM. Those numbers matter when you return to playback and evaluate results, but they do not change the hand cleaning technique.
Practical tips from the studio
When I was at Sonic Arts Studio we handled test pressings and color runs (some over 180 gram pressings). Color vinyl can show fingerprints more readily, but the cleaning protocol is identical. I once received a 12 in custom press that smelled like cigarette smoke; after three gentle wet cleaning cycles and a thorough rinse with distilled water the smell was gone and surface noise dropped noticeably.
Dealing with stubborn grime and tricky records
Stubborn grime calls for patience, not force. Repeat gentle wet cleaning cycles rather than increasing pressure. For spot cleaning use a soft foam swab lightly dampened with distilled solution and work along the groove only.
Things to avoid:
- Do not use tap water. Minerals will leave residues and increase surface noise over time.
- Do not use household cleaners with ammonia, bleach or high solvent content. These can damage the vinyl or the label adhesive.
- Avoid concentrated isopropyl alcohol on all records. Some vintage pressings and colored vinyl can be affected by strong solvents. In my experience, low percentage, limited-contact isopropyl formulations have a place in professional cleaning, but they are not a universal solution.
If after repeated hand cleans the record still tracks poorly or shows persistent clicks, consider a vacuum record cleaning machine or professional ultrasonic cleaning. Those systems are not always necessary, but when you are restoring an archival lacquer or preparing a master for reissue they can make measurable improvements in dynamic range and noise floor.
Stylus care and routine maintenance
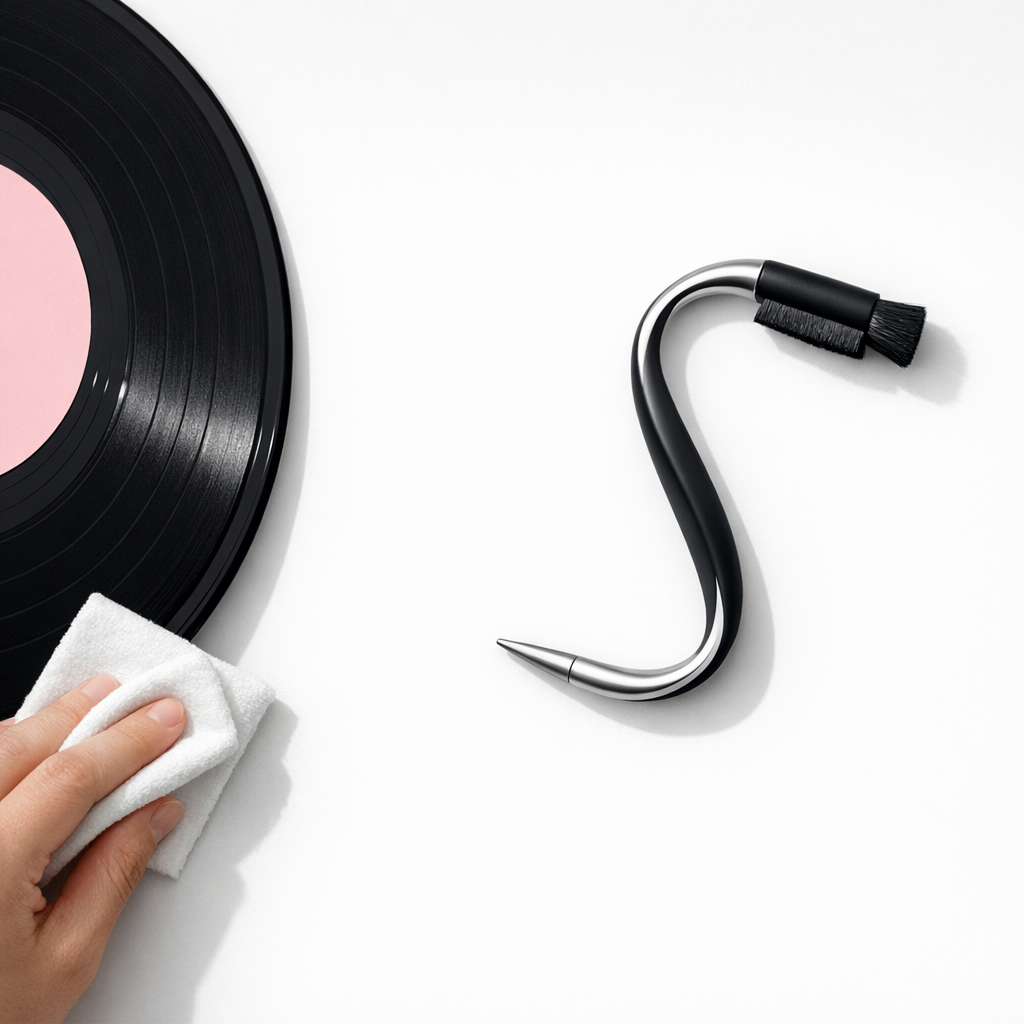
Cleaning records and cleaning the stylus are separate jobs. The stylus picks up micro debris and oils that will recontaminate a clean record if not addressed. Clean the stylus with a dedicated stylus brush or a recommended stylus cleaning fluid. I use a small S-shaped stylus brush and a light touch under magnification when needed.
- Do not use your record cloth on the stylus. The stylus needs a brush designed for the job and fluids that evaporate cleanly.
- Replace or inspect cartridges periodically. A worn stylus increases groove wear and surface noise over time.
In my studio I keep a small rig with a stereo microscope and an Audio Technica AT-VM95E cartridge as a spare reference. Being able to see the stylus tip makes the difference between guessing and precise maintenance.
Common mistakes and a short glossary
People make the same mistakes repeatedly because they are trying to be efficient. The technical side is simple: avoid lateral force, avoid contaminants, and finish with a clean rinse. Here is a concise list of errors to avoid, followed by a short glossary of terms.
- Rubbing across grooves rather than along them. This pushes debris into the groove walls and can increase surface noise.
- Using tap water, paper towels, or fluffy cotton swabs. These leave fibers and minerals.
- Excessive force or aggressive scrubbing. That will abrade groove walls and cause permanent damage.
- Letting records air dry flat or stacked when damp. This traps moisture and encourages mold.
- Using strong household solvents on all records. Some pressings and labels will be damaged.
Short glossary
- Groove: The spiral track on the record that encodes audio; cleaning should follow its direction.
- Carbon fiber brush: Soft anti static brush for dry dust removal before or after play.
- Distilled water: De mineralized water used to avoid residue when wet cleaning.
- Inner sleeve: Protective sleeve (polyethylene or rice paper) used to store cleaned records.
- Stylus: The needle on the cartridge; clean separately with a dedicated stylus brush.
Objectively speaking, the simplest mistakes are the most damaging. In my experience a single improper scrub can introduce irreversible noise. Treat every record like a finished optical master.
How this applies to custom vinyl and gift pressings
If you order a custom PRISM or NOIR pressing from Vinylacy congratulations. Premium pressings from a reputable press in France are well made but not immune to press dust and handling marks. My advice for custom vinyl is the same: dry brush on arrival, then inspect. If you plan to sell, gift, or archive your custom run, perform one careful wet clean with distilled water and a minimal surfactant. That ensures the color and print sheen remain true and the dynamic range of your music is preserved.
Packaging matters. Vinylacy’s premium inner sleeves are fine, but I still recommend replacing paper inners with polyethylene sleeves for long term storage. It is a small step that prevents recontamination and preserves signal path integrity.
One studio anecdote: we prepared a limited run of custom covers and discovered a printing ink that interacted with inner sleeves, leaving a faint transfer on the run. A careful cleaning protocol plus polyethylene inners fixed the issue before shipment. Small production details matter.
Final practical checklist to remember:
- Always dry brush first with an 8 to 10 in carbon fiber brush.
- Use distilled water; example mix 500 mL + 1 to 2 drops mild soap, rinse with plain distilled.
- Work along the groove, not across it. Blot from inner to outer edge when drying.
- Keep labels dry and dry records vertically. Use anti static inner sleeves for storage.
- Clean the stylus separately with a proper stylus brush.
If you take one measurement away: a careful hand clean that eliminates surface dust and residue can reduce broadband surface noise by several decibels, which is audible as improved bass clarity and a quieter background. In practical terms, that is worth ten minutes of work per record.